The pictures that I am sharing today are showing our biggest garden project for 2013: the vegetable garden fence. We had been growing vegetables since the first year we moved on this property 14 years ago.

Here is a fall view of our house and garden from the street. The garden is located on left side of the house as you look at the property from the street.

We had been building about one raised bed every 2-3 years but in the recent years we had difficulty protecting our crop from the deer. Here is how it looked before the fence:

After I found all of my first green tomatoes gone each year I would then install a temporary bird netting around each individual raised bed! Don't ask how I worked the garden with all that!


As you come from the backyard you approach the vegetable garden through a narrow shade path built by hubby years ago. To the left you can see our rain barrel dressed in moss sheets this year to blend in with the natural look of the area.

We added one sitting area by the garden two years ago because it was such a shady spot, not even grass grew well there. We painted the bench and chairs in blue, olive and orange and added several bird houses in the tree above in matching colors. The inspiration for the colors came from the wooden garden sign on the table.


This early spring my husband enrolled two friends and my 11 year old daughter in building the vegetable garden permanent fence. Before you see more of the pretty pictures, let me show you the hard work of the "work crew":
 |
| Digging in clay to place the poles are friend Brian and hubby Nick |
 |
| Brian cutting wood with assistant Ali 11 years old (she was excited to help "the guys") |
 |
| Our very handy friend Gabi designed and built the entry gate among other things |
 |
| Ali fell in love with the nail gun! Nobody could touch it after that! |
 |
Ali and hubby Nick at the heart of the project
So you may wonder, what did I do to help this project? Well, I cooked for the "crew" and cleaned tools after they were gone. Packed and moved the leftover clay and fixed the grass. The easy stuff!
 |
And then I planted my "babies" (tomatoes, zucchini, squash, peppers and cucumbers). All started from seed under a lamp in the house during the month of March. Here is a top view from the roof of the sun room a few weeks after Alexis and I planted the garden. It was evening but it gives you the best view of the finished product.

And my favorite picture of the garden is here taken in July:

So lets go inside the garden, shall we?
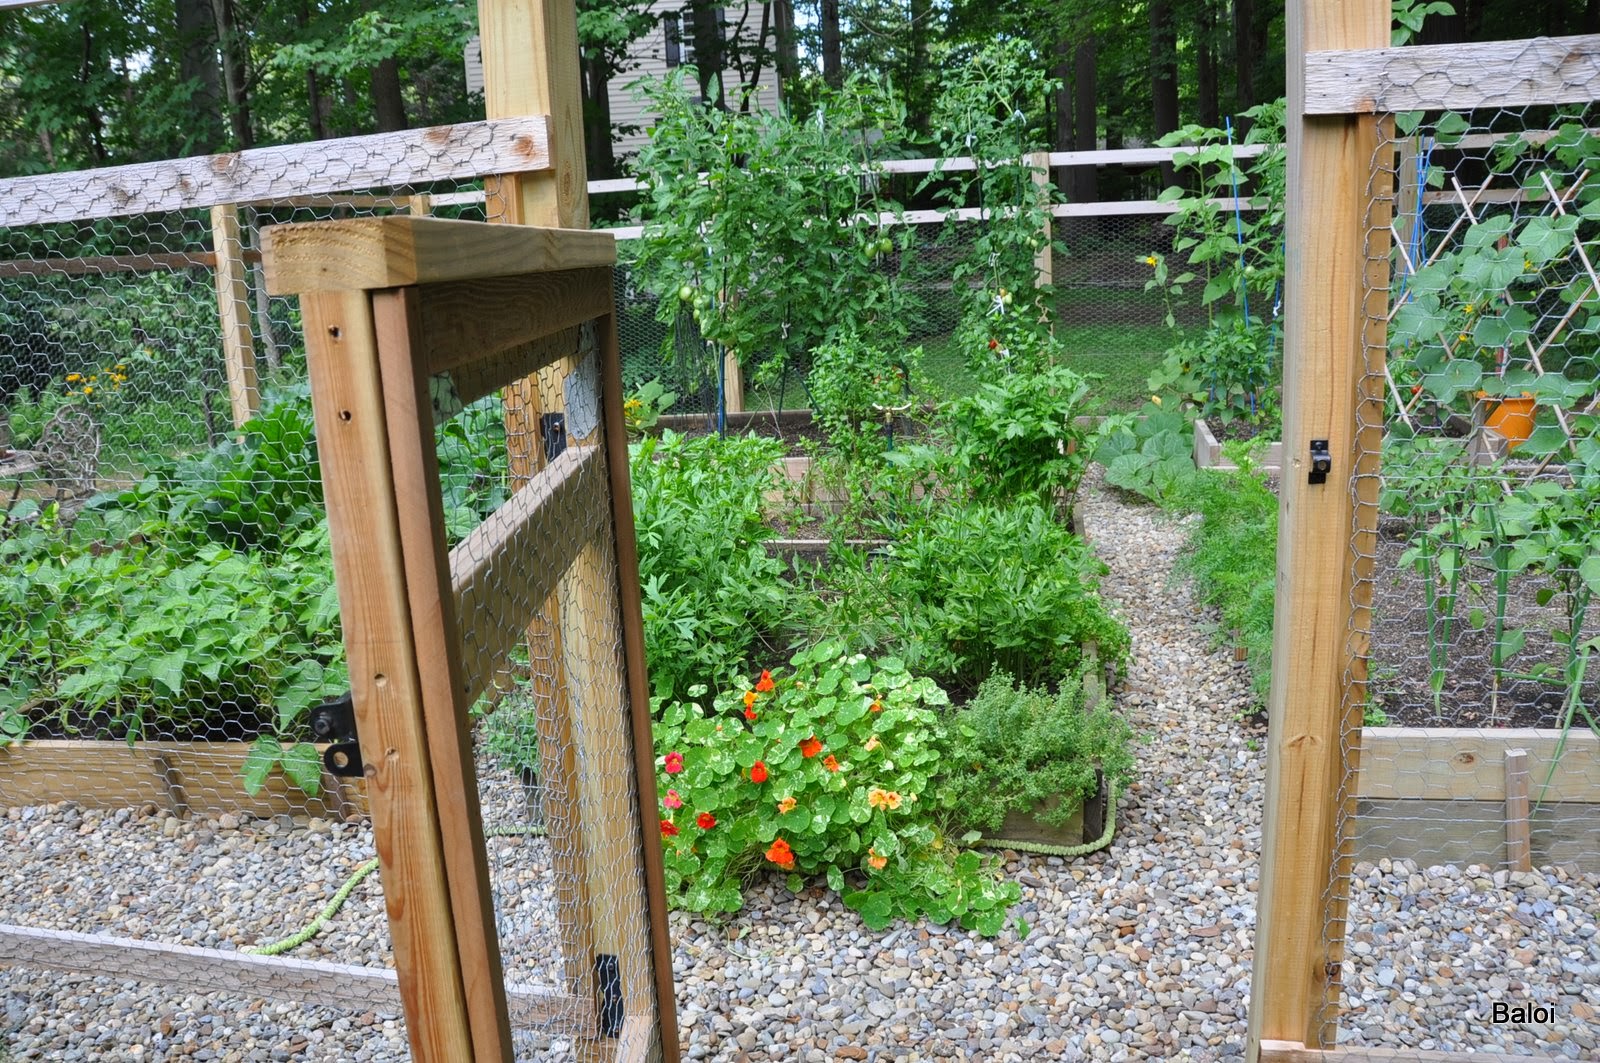
When we are away from home for a week in the summer, I attach the stretchable hose to a sprayer pole strategically located in the middle of the herbs bed. We then set the watering timer to turn the water on for 30 minutes each morning. It worked so well this year and we didn't have to ask anyone to water for us.

As you walk in the garden, the herbs bed now consolidates all my herbs. They used to be spread everywhere. During the summer garden tour, I labeled each herb using forks and old wine corks. I also had some ceramic labels but were not as showy. The white flowering herb is new to us: Valerian. I didn't use any of it yet. It is suppose to be good for sleeping and calming but I enjoyed the fragrant blooms that attracted bees to the garden.
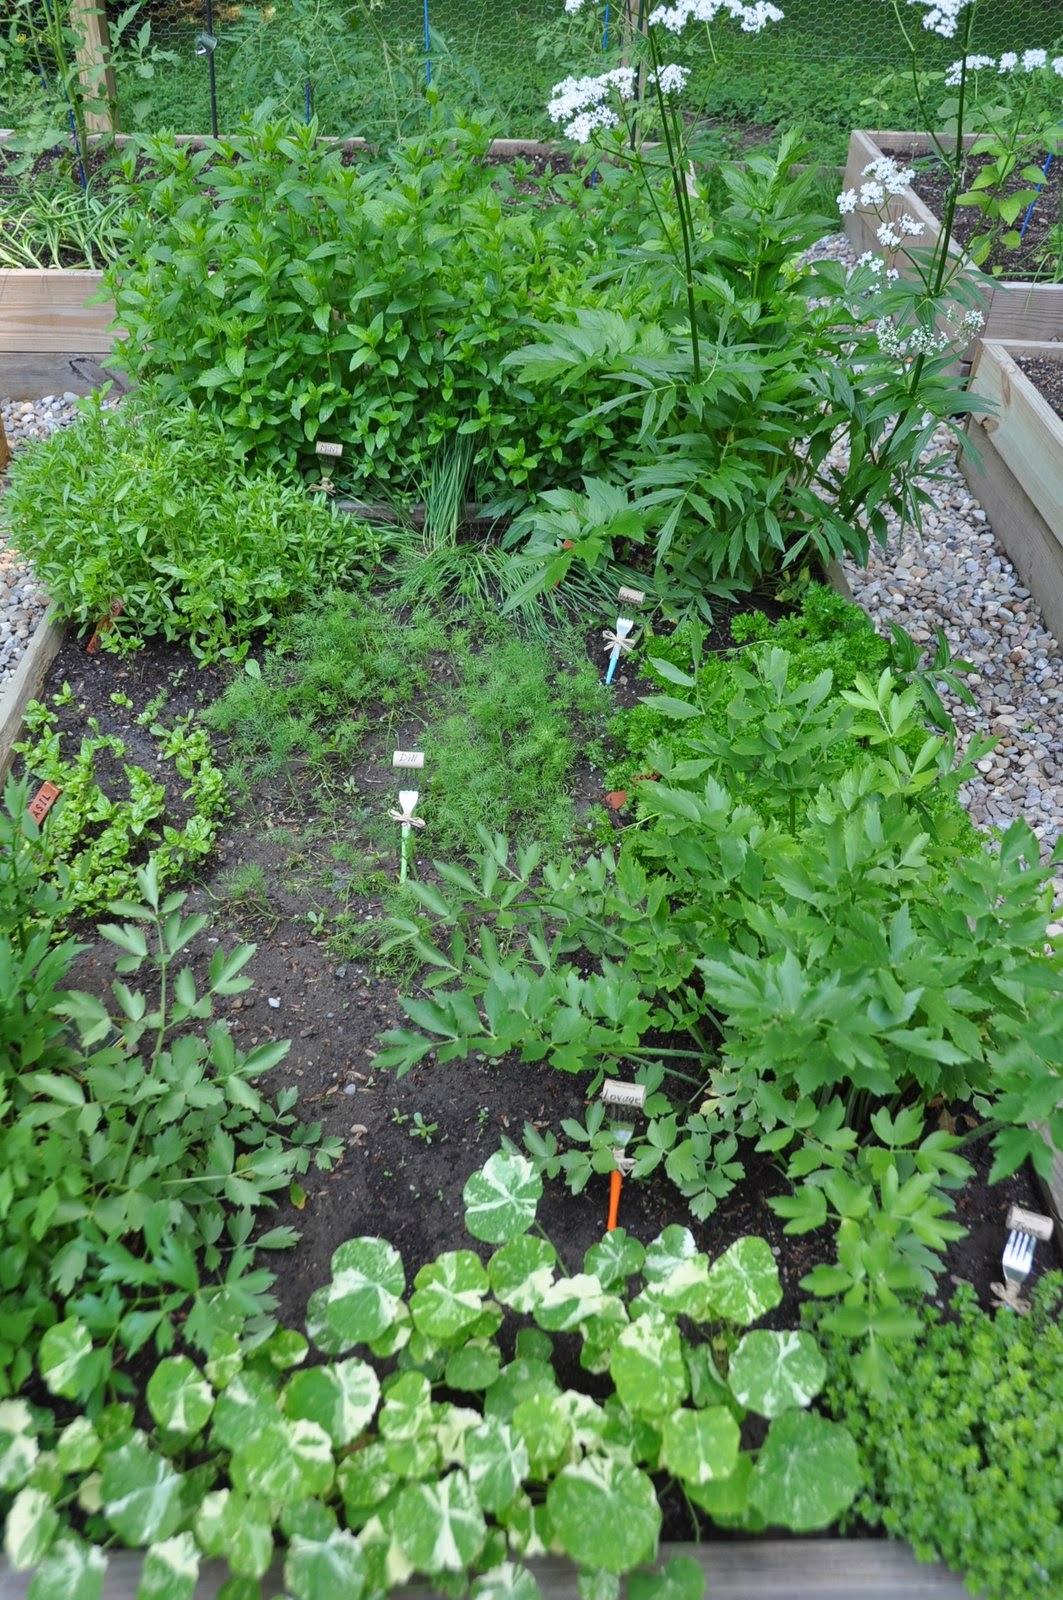
Here is a detail:

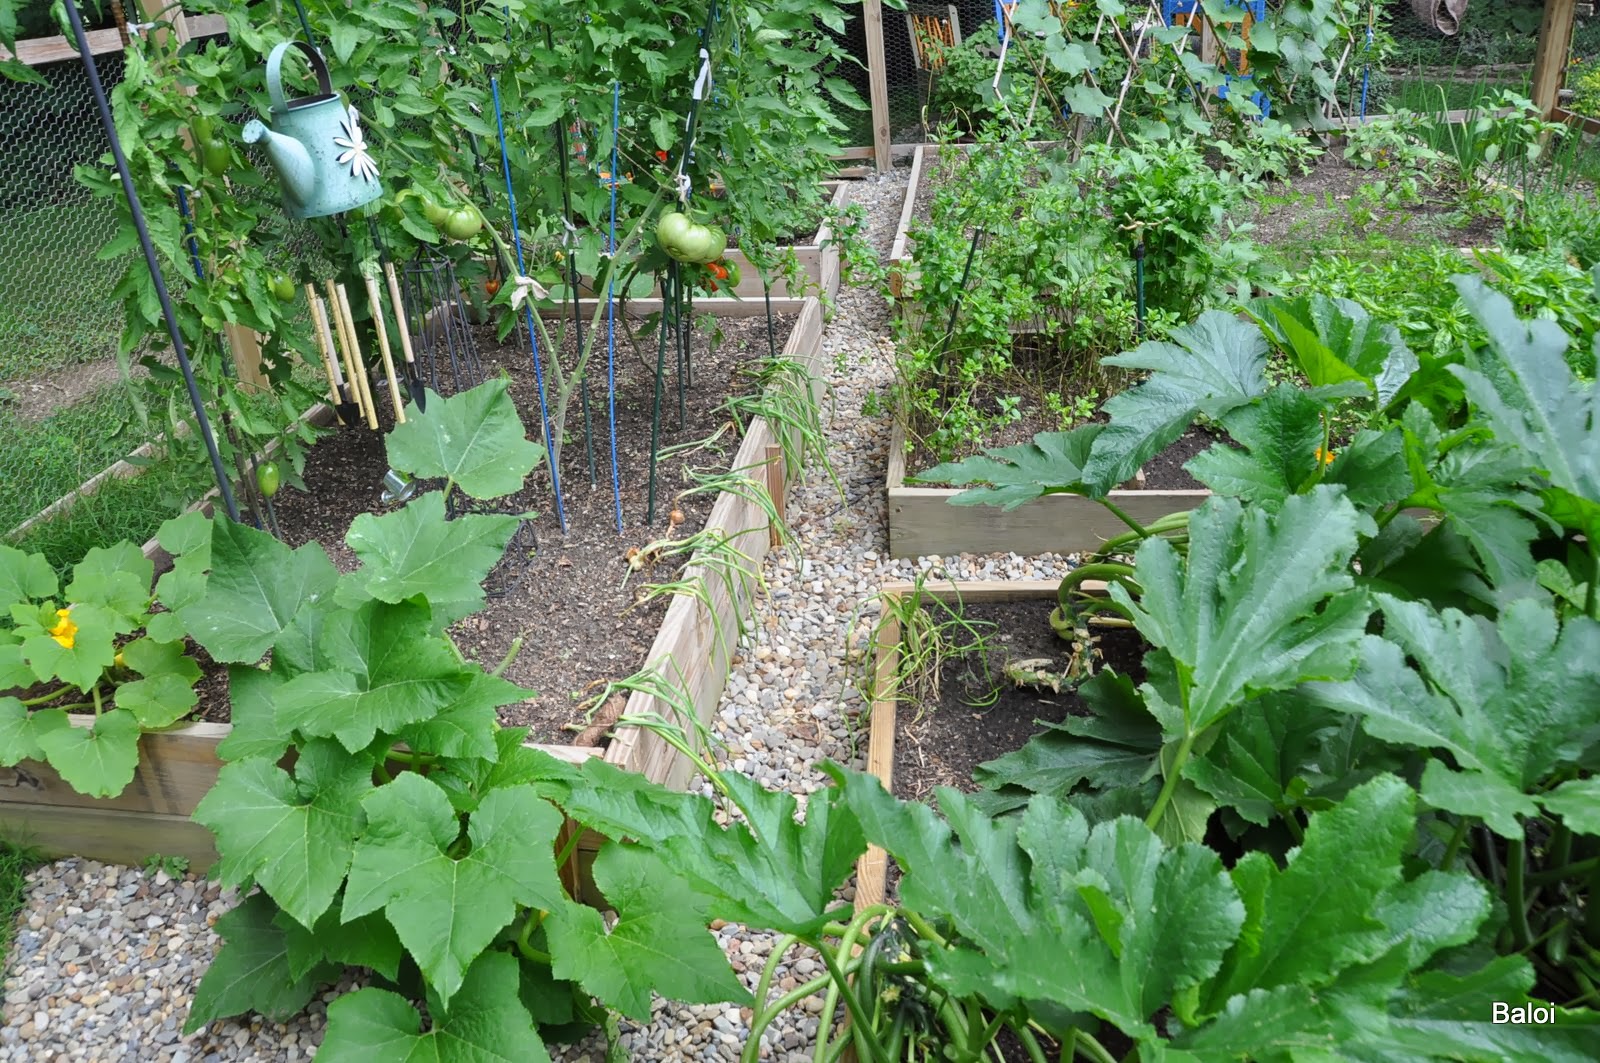
This large bed had lettuce and green onions earlier in the season and then we added the carrots, sweet and hot small peppers and cucumbers. The hard neck onions I grow both from last year shallots or seed and I had for many years going and going here in the garden.

With the extra cedar boards, hubby built a corner box that allows us to grow more vertical plants. This year we tried the pole beans for the first time in years and we were very happy with how well they did. To decorate the box, at the base I planted begonias that flowered in orange.

I don't know about growing zucchini again next year. I pollinate the flowers manually and I picked squash bugs daily. The three zucchini plants shared the 2 by 4' bed with two rows of green onions and lots of bush beans but took a lot of space. The three squash plants I also grew didn't not do as well as the zucchini and I will definitely not grow them next year.
Bellow, the square box is the kids garden. The front has Alexis' choices: Jalapeno peppers, tomatoes, basil and catnip. The back has Luca's : gourds and sunflowers

In addition to adding gravel between the raised beds my husband also brought a water line with a faucet right in the decorative pot you see below holding the butterfly nets. In there we are hiding the stretchable hose and when not in use you can't even tell that is there.
 |
 |
| Tomatoes ripping on the vine |
 |
| Raspberries flower buds |
 |
| Figs in a pot |
 |
| Cucumbers! We had lots and lots until October! |
 |
| Sweet peppers |
 |
| Alexis' hot peppers and basil |
 |
| Flowering Maple or Abutilon - annual in the pot |
 |
| Alexis' cat Oreo, testing the strength of the fence while on the look-out for voles and moles |
 |
"Marvel of Venice" pole beans
Not shown here are the alpine strawberries and the blueberries that I planted this year by the street fence and produced a few hand full of fruit to my surprise. I can't wait for next year!
|
How magnificent! Very inspiring, too. What climate are you in? Those plants are doing really well for so much shade. It must get pretty warm in your summer. In Seattle the summers are short AND cool, more's the pity for vegetable gardening. And your daughter rocks. Loves her nailgun, indeed!
ReplyDeleteHi Sara
DeleteWe are in hardiness zone 5b ! I only get sun on the garden plot from 12-12:30pm to 5:00-5:30pm. It is amazing to me that we grow as much as we do. The summers here do get Hot fast and humid. Many years we feel that there is no spring. We believe that good soil in the raised beds, added compost every year and some natural fertilizers contribute to the healthy garden. Also, even if we do not get direct sun till noon, the light is bright for another extra hour in a day which helps!
Yes, our handy daughter rocks! She has many talents and interests! Piano, violin, tennis, volleyball, bikes, roller boards, skates and cutting the grass (:)! She is daddy's helper on all mechanical projects!
Great shots of a wonderful garden.
ReplyDeleteThanks Carver for stopping by and for your comments!
DeleteYour garden looks lovely and wow...that is some vegetable garden! It looks like all your group effort really paid off.
ReplyDeleteThanks Lee for stopping by and leaving a comment!
DeleteWow....your garden is super amazing!
ReplyDeleteHave a great week...
Ruby
Thanks Ruby!
DeleteLindas imagens! Que maravilhosos frutos do trabalho e da generosidade da terra! Parabéns!!!
ReplyDeleteMiriam, Obrigado por deixar-me uma mensagem! (Hopefully this sound correct to you!)
DeleteI love this garden fence. Your garden looks very much like mine (with rasied beds) and I'm hoping to build a fence for mine just like yours. Could you provide me with a few details that might help me. What length of of 4x4s (or did you use 6x6s?) did you use for the posts? How tall is the chickenwire that you used? What spacing did you use between the posts? The rails running horizontally around the enclosure appear to be 1x4s in cedar, is that correct? The gate looks like 2x4 framing with 1x4 holding in the chickenwire, correct? I've had this blogpost page saved for two years, waiting until I was ready to build the fence, I am so excited to get started this spring. Thanks!
ReplyDeleteThis comment has been removed by the author.
DeleteI just now realized that I didn't provide any measurements for our garden fence design. When we started we didn't have a plan.we were limited on 3 of the 4 sides by the neighbor' property line, house corner and sitting area so we placed the 4 corners in such a way that we still have passage inside by 2.5ft, outside by the house corner 2 ft and not infringe on the property line. The poles were 8ft long and he selected 3.5x3.5". He buried in cement 2 ft. The chicken wire was 4 ft wide. We placed the bottom rail somewhat away from the ground by 8" so that we staple a second width of chicken wire down into the ground also another 6"-10". I wish we buried 12" and used a smaller holes fence wire since we have a mole problem that clearly started outside the fence and went in. The rails running horizontal are 2.5x0.75". He also used faces on each pole vertically that were 3.5x0.75 to allow the fence chicken wire to be stapled not only on the horizontals but also on the poles. Yes cedar everywhere. The spacing between posts varied based on the width and length of the garden after we placed the corner posts. In front except where the gate entrance is, he used 63". On laterals he used 70". The back has 70s as well. The gate uses 3.5"x1.5" framing toped with another 3.5"x1.5" piece holding chicken wire. About 50" tall and 33" width for the inside wire space. I hope this helps!
DeleteThank you so much for your reply! I'm very much looking forward to getting my garden fence up and keeping the critters out. The note about burying a small hole wire fence deeper is a good suggestion, we have moles in our yard and that will help in keeping them out! Thanks again!
DeleteOne last question (I hope), do you have anything running under the garden gate to keep things from crawling under it? Thanks!
DeleteOne heads-up that another gardener gave me when I had this garden posted on Fine Gardening Blog was that after a couple of years the wire fence buried under the ground will rust and fall apart. He warned me that the solution with the underground critters is not forever. At the gate opening the ground was not quite level so the bottom wood part is a couple inches higher than the grass and from inside we stapled a piece of chicken wire that can drag thru grass when we open the gate. When the gate is closed it keeps critters from going under. This is what we forgot. To bury some chicken wire at the gate opening. That is exactly how they got in! All the tunnels from the grass led to the gate and then under the gravel into the beds. The beds have been a mess in the last two years with holes everywhere. I take the cat with me in the garden a couple times a week and sometimes I lock her in to work. After a while she gets bored with the assignment and jumps the gate and comes back into the house. Good luck with your fence project! Send pictures when you are done!
Delete